Wednesday, February 22, 2012

Cloudwatching - by Debbie Ridpath Ohi

This piece began as one of my Daily Doodles, where I experimented with a very loose and very sketchy line (no initial sketch/shapes) in Photoshop CS5:

I initially envisioned the little girl and her monster to be on a rooftop, but decided to put her on a hillside looking up at clouds in the sky instead:


I added some subtle shading in the bottom part of the hill to add a feeling of depth. I also used more than one pale grey for the clouds...again to add some texture and depth.


Next, I colored in the girl and the monster. Then, to make the hill look more like a natural part of the illustration, I added grass and flowers:


I drew in the stalks of grass by hand (digitally, that is) but did some cheating -- I only did a few sections, then copied and pasted those sections around the hill, altering the rotation a bit so it wouldn't look so obvious I was cutting and pasting. Then I added in some extra blades of grass here and there by hand.

Here's a screenshot of my layers, for those curious:


Yes, I love layers!

Next up: the fantabulous FRED KOEHLER.

I'm starting to blog about the process of creating I'm Bored (written by Michael Ian Black, illustrated by yours truly) with Simon & Schuster Books For Young Readers, for those interested. Included: photos, quotes, sketches & process info from the very beginning, working with editor Justin Chanda and art director Laurent Linn, through to finals and launch. I'd be delighted if you joined me.


Wednesday, February 15, 2012

Gladys And Her Cat by Russ Cox


© 2012 Russ Cox | Smiling Otis Studio

In celebration of Valentine's Day, I decided to work up a sketch I had lying around my studio that I called "Gladys And Her Cat". It is based on how children usually carry a cat around the house. I though adding the drawings hanging on the wall would help emphasize her love for her cat.


This is a tighter version of the sketch. I lightened the nose and mouth on Gladys so the line work would not stand out in the final art. The line work was converted to a dark purple to give it a bit more life than using black.


Using the multiply layer in Photoshop, I did a grayscale underpainting which I duplicated and then added a red tint. This makes it a two layer toned underpainting so that I have a dark value to paint on which helps the final art colors pop.


Working like a traditional painting, I started from the back by painting in the walls, patterns, baseboards, and floor. This helps me decide what colors to use for the main images and prevents color revisions later on by trying to get a background color to work with all of the main elements. The final art layers are set to "normal" but have my brushes set to 20-45% opacity. By doing this, it allows me to build up the color.


I then painted the drawings by using a crayon-like brush. I though the paper should be a few colors like construction paper. The dog and mouse were painted next.


Continuing moving to the front, Gladys was painted in the next step. I thought having her as a redhead would help solidify the concept of "love". 


The valentine's card and cat were painted. I used my orange cat as a model for color and attitude. Sometimes I will play with the saturation if I find the colors getting flat as I work. Gladys' skin tone got a mild boost so she looks more lively.


I thought I was about done with the illustration but the floor seemed too bare and boring. Building on the drawings in the background, I decided to add some additional drawings on the floor with a few crayons laying about. I quickly sketched the new items out, scanned them, and added them onto a new layer which I multiplied so the white drops out and the line work is  showing. Working digitally allows one to add and subtract images as they work without having to start over. 


The final image has the new elements painted, some of the line work beefed up and highlights added. 

You can view more of my work at:

Tune in next week to see what the talented Debbie Ohi has up her sleeve!


Wednesday, February 8, 2012

Illustrating a Non-Fiction Picture Book from Hazel Mitchell

This month saw the publication of a book I illustrated for Charlesbridge Publishing' imprint Mackinac Island. The book is 'Hidden New Jersey' and it's the third in a series featuring the States.Written by Linda J. Barth (of New Jersey), it's the first non-fiction book I've worked on - and it was quite a challenge! I thought I'd share some of the process looking at how I tackled the illustrations.


The book's a 'search and seek' concept with hidden objects on each page for children to find. There were a LOT of facts to incorporate on each double spread, each featuring a different area of the state.

This book came to me in an unusual way ... the developer, Anne Lewis, saw my work on my Facebook Fan Page and emailed me to ask if I'd be interested in doing the book. Hurrah for social networking!

I received the m/s in January 2011. At this point I realized just how much research was involved - I took a big gulp. Each area of the book was broken down into a list of facts and suggestions for hidden objects. The developer suggested I write notes on how I saw the images for each page before I started sketching. This was a great idea and saved me a bunch of time ... I spent a couple of weeks looking at images for each page and making rough notes on how I saw then working as a whole. The first thing I realized was that the objects suggested for 'hiding' took away many of the options for great compositions ... so I asked if I could choose what to hide instead. I began files of images for each illustration, making sure I had many different reference and bearing in mind the copyright restrictions on images. I made my own references sketches and often merged many different views, or worked from out-of-copyright photos. This kind of book is hard - there isn't time or money to go round taking your own photographs, which would be the ideal situation!

When I felt I'd researched enough I began to make rough sketches of each layout. In this case the rough sketch was pretty much how the finished image turned out.


I also researched the items I would hide on the page (which are all mentioned in the 'facts').
I also laid out a page to scale with the hidden objects and blocks for the text.

All the rough sketches went to the developer at Mackinac Island Press for approval .. then it was on to finished pencils.

I worked on all the images at the same stage. There were very few changes ... just minor ones to make sure things weren't in the gutter (page fold) and that the text would fit around the image.

I worked at 150% scale and scanned all the images in at 800dpi, reducing to 400dpi in CMYK at the finished size. It was a LOT of scanning. I think people forget about scanning time ... I like to do my outline work by hand and my colouring (in this case) digitally ... so scanning and then clean up time can take almost a week or more for a whole book.

NOW the fun part ... colouring! I coloured in photoshop ... it's something I have been doing for many years. I still love working by hand, but for a project like this digital painting means I can do it in a few weeks. Otherwise the time to complete this book would have been 3 times as long! (Total time was about 4 months.)

Here is the finished image and below are the hidden objects ...
     And this is the finished page in the book!

                                               
One of the hardest parts about tackling this project was no running narrative. Each page is it's own entity ... although we did have a couple of themes running through the book. The kids in the canoe appear on several pages and also a little bumble bee (who is the mascot of the book and the state insect) is on every page doing something different as a little extra thing for children to find.


I also created the front and back cover art and bits and pieces for the verso and title pages.


Now that the book is out there I've been busy helping to promote the book ... which is when the hard work begins, right?

You can see the book trailer I created here ... http://www.youtube.com/watch?v=uuXJfjc-Dgo
if you want to learn more about how I did the book trailer, please visit my blog.

Hidden New Jersey is available to buy in all good bookstores or online!

Join the Hidden New Jersey Facebook Fan Page! http://www.facebook.com/HiddenNJ

Thanks for dropping by. See more of my work online  http://hazelmitchell.com

Come back next week and visit Pixel Shavings to see what illustrator Russ Cox has in store for us.

Toodles!
Hazel

Wednesday, January 25, 2012

Tea Time by Sheralyn Barnes

It's January.
That time of year when the winter doldrums set in.
So this week, as the grey skies were bringing me down,
and I was feeling a bit small,
I thought to myself how nothing beats the winter blues like
a hot cup of tea,
a friend,
and my imagination.


 ©2012 Sheralyn Barnes


 And then I pulled out this old friend again,
who despite appearances,
should be getting us closer to spring here soon.....

 ©2012 Sheralyn Barnes

 Happy Groundhogs day on February 2nd!

Spring will be here before we know it....

Thanks for checking in!
You can see more of my work at 

Look for another great post by
John Deininger next week!

Wednesday, January 18, 2012

Concept is King and the rest of us are Jokers by Fred Koehler

For this week's post I thought I'd use a recent piece that was entered in the SCBWI Tomie DePaola contest based on the classic tale of Chicken Licken. (The sky is falling! The sky is falling!) You can see everybody's entries here.
My entry did receive a good number of comments, and a lot of them talked about an appreciation of the "concept" or "idea." So I thought I'd try and share a little bit as to where and how I find concepts and ideas for illustrations.

To be honest it all starts in a text document before I even pick up a pencil. I ask myself the question "What would make this funny? Or different? Or cool?" That list of answers might hit 30 or 40 before I'm start to go back through and decide which one(s) to research further. A lot of times I try to take what's expected and do the exact opposite. (Instead of "eating pancakes for breakfast," try "pancakes eating their breakfast.")

For the Chicken Licken story, my list included "looking through a hole in the sky" and "24 [the tv show] cut-scenes." Those two stood out and I sketched them, but wasn't thrilled with the results. But here's the cool part. In doing the sketches and researching the characters, I kept my eyes open for other concepts to add to the list. I talked through the sketches with friends and colleagues and my list of concepts grew even bigger.


During this process, lo and behold I encountered a vision of the holy grail of comic iconography – a rubber chicken. And where do rubber chickens live? In a toy box. From there I started wondering if there was an iconic toy counterpart to all of the other characters. Lo and behold there was! As I finished my research I never even ended up using the rubber chicken, but that's where it all started.

Then, after all that, I did sketches. I decided on a vintage palette and a toy shelf instead of a toy box (so it would be easier for the "sky" to be falling). The result, I thought, was successful.

I titled this blog "Concept is King" because I honestly believe that the work we do before ever setting pencil to paper is the most important. The magic of our character interactions, the reaction we hope to get from our viewer – we can document those intentions and work till we achieve them.

Best of luck to all of ya, and keep up the good work!

~Fred
flikr.com/superfredd

Wednesday, January 11, 2012

I'M BORED book illustration from sketch to final - by Debbie Ridpath Ohi


In this post, I'm going to show the step-by-step evolution of one of the images from I'M BORED, a new picture book from Michael Ian Black and illustrated by yours truly. You can see a bigger version of the spread above on the Simon & Schuster website graphic excerpt page from I'M BORED.

I love Michael's story. It's funny and inspiring, and I think it's going to appeal as much to grown-ups as it will to kids. I had a ton of fun creating the illustrations for this book and thought I'd share part of the process.


Above: an early version of the "little girl pretending to be a rampaging monster" image. I made the notes during a meeting with Justin Chanda (publisher & editor) and Laurent Linn (my art director).

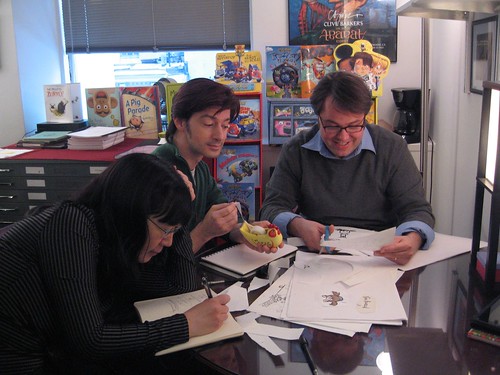
With Laurent Linn & Justin Chanda at S&S.
Photo by Danielle Young.

They loved the monster hat on the girl. We decided to make the girl's mouth look more interesting; Justin & Laurent suggested making it look a bit more like the monster's, maybe echoing the shape. We also decided at this point to make any fantasy elements in the story easier to separate from the real-life elements by coloring them blue.


Above: the preliminary sketch for my revamped drawing. My sketches tend to be very loose, as you can tell, mainly to block in the shapes. Next, I added the line art:


Then I added the fantasy elements in the background (the town), color and the woodcut finish to the line art.


At my next meeting with Justin and Laurent, we decided to color in the girl's mouth throughout the book and to move the potato to the foreground where it would be more noticeable. Plus I needed to add the screaming people back into image (oops, I'd forgotten them). Here are my notes during the meeting:


And here's the revamped image:


In the final layout, Laurent flipped the image so it would work better with the overall spread, then added text:


I LOVE how it turned out and can't wait to see this book on the shelves.

I'll be talking more about the process of creating I'M BORED with Simon & Schuster Books For Young Readers in the I'M BORED Facebook Page, so please do bookmark/Like.

Next up on Pixel Shavings: the fabulous Fred Koehler!

For more info about my projects, please visit DebbieOhi.com. I blog about kidlit/YA writing and illustrating at Inkygirl.com.

Wednesday, January 4, 2012

Developing A Concept by Russ Cox

© 2012 Russ Cox | Smiling Otis Studio

Happy New Year Everyone! For my first post of 2012, I thought I would share how I developed the concept for the above illustration. 


I started out with doodling in my sketchbook. The idea of a child swinging on an old branch was too symbolize "old and new" as well friendship.


After working up the sketch into a tighter drawing, the symbolism was not working and the tree branch became too scary. Especially when the end of the branch was turned into a gnarled hand. It seemed to be ready to grab the girl instead of forming an arch to show protection.

Since the sketch was not working, I decided to go back to doodling, trying to rework the concept or come up with something complete different. Sometimes it is best to step back and come from another angle. The idea was to make the illustration warmer in concept, so I thought what if she had a large oafish friend who would do anything for her. Maybe something happened to the tree where she had the swing and her friend was welling to pretend to be one to make sure she was happy. 
After roughing in the new layout, I noticed that I did not like the position of the rope over the girl's face. Plus the hand turned down had a negative feeling so I thought he needed his hand turned upward. Since he is pretending to be a tree, it was natural to put a bird's nest in his open hand.


I sketched out the new hand and girl which I dropped over top of the existing sketch. It saved me time redrawing the sketch for a third time since I would be doing a tighter version as my base for the final color illustration. I feathered the edges in Photoshop when I cut out the images so they overlapped the original sketch seamlessly.
The flowers were removed because they were a distraction from the interaction between the two characters. This is the final sketch which became the base of the final illustration which I rendered in Photoshop.
 In the final illustration, I wanted to mute the color palette so the warmth of their friendship shined through.
Having worked in Photoshop for the past 8 months, I think I am ready to tackle Painter so I may post the results next time.


Thanks for reading and following our glog.
Russ

Look for Debbie Ohi's always inspiring and insightful post next week

www.smilingotis.com
Smiling Otis Facebook Fan Page
Smiling Otis Studio Blog