Wednesday, November 30, 2011

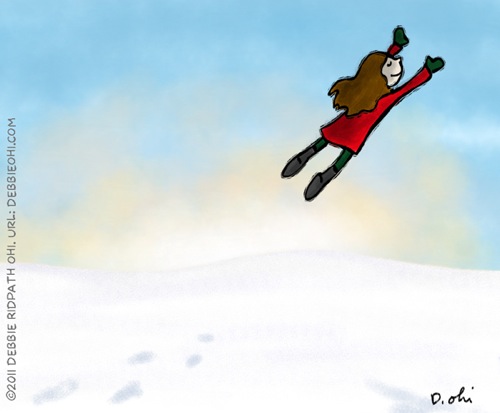
Snow Flight: created with the Sketchbook Pro app on the iPad by Debbie Ridpath Ohi

FinalSnowFlight v2 600

Can't believe how quickly this year went by! This was my first year with Pixel Shavings, and I want to thank Hazel, Russ, Sheri, Fred and John for all their encouragement. I feel honoured to be part of this amazingly talented group.

This week, I'm going to show you how I created my winter-themed illustration, SNOW FLIGHT, using Autodesk's Sketchbook Pro app for the iPad. First I created the sky in a separate layer using a flat blue. Then I added texture in a slightly darker blue.
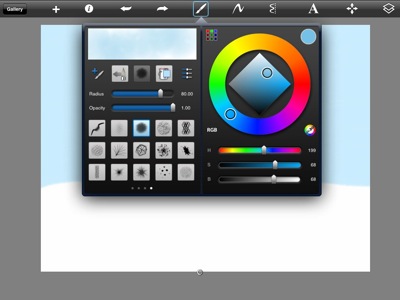
OHI03

One of the advantages of working digitally is that it's easy to make copies, in case I screw up. Before making a radical change to any layer, I always make a copy of that layer and then hide it, just in case I need it later. In the image below, you can see how I've hidden the extra layer by clicking on the eye icon. In the active/topmost layer, I then activated the transparency mask and then added a sunrise texture/color. Because of the mask, I'm only painting on blue part of the picture, not the snow.
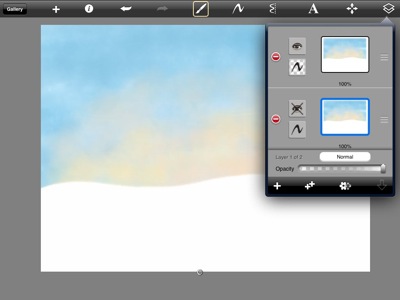
OHI05

In a new layer, I created a separate transparency mask for the snow. At first I tried doing this with white but found it too confusing so switched to an obnoxiously bright blue:
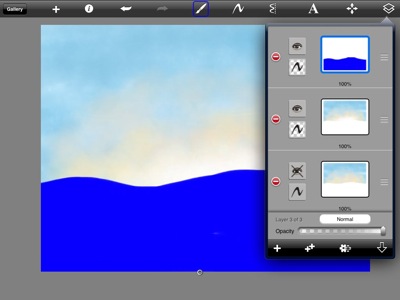
OHI07

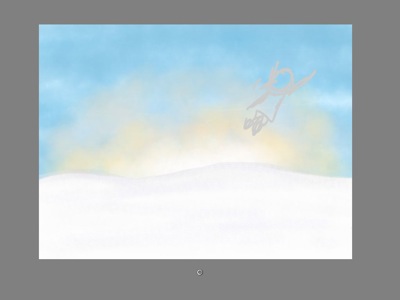
After activating the transparency mask for the ground and painting it white, I added some texture to the snow. Then in another layer (I LOVE LAYERS), I did a quickie sketch of the flying girl.
OHI12

Next, I drew the girl. Um…as you can tell, I pretty much ignored my original sketch. :-) After I finished the ink drawing, I deleted the sketch layer.
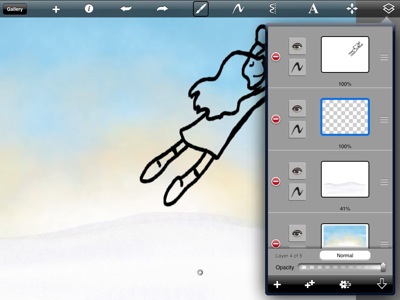
OHI14

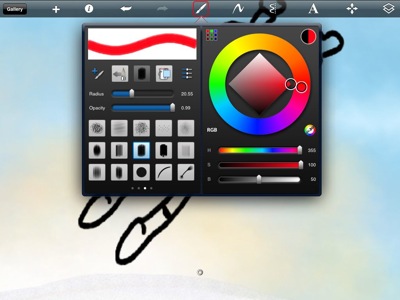
Next, I added color. I should note that I always hated coloring when I was in school because I found it so boring; I was always the kid in school who drew stuff so other kids could colour. Now I love it! Coloring's much easier digitally because I can make the brush really big so it doesn't take as long. Then I can add textures.
OHI15

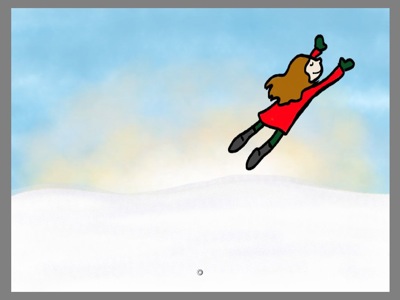
Here's what the colored version looked like:
OHI16

I didn't like the way the black outline looked -- too boring and flat compared to the background -- so decided to add my woodcut effect, This is gradually becoming one of my "go-to" illustration styles because it feels so natural to me.

In Photoshop CS5, I use the Layer Mask tool but in this app, I used the Eraser tool instead:
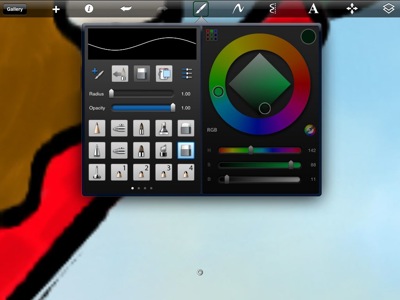
OHI19

I started manually erasing bits from the ink outline. This is the most time-consuming part of the process:
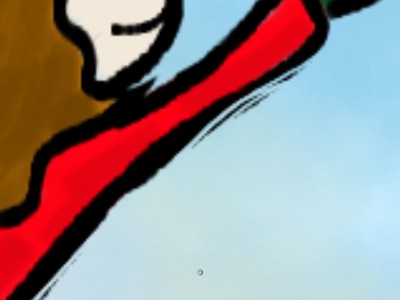
OHI20

But I think the results are well worth it (you can see a bigger version here):
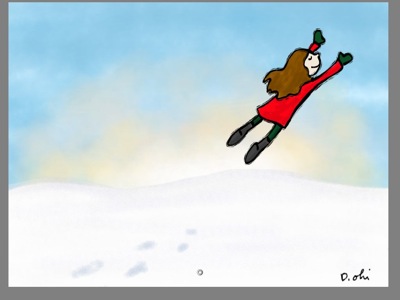
OHI25

I added some footprints in the snow and signed it, then took the image into Photoshop (the app lets you save in PSD format, yay) and added more shadows as well as adding the copyright notice. I could have done this on my iPad using Sketchbook Pro & other apps, but I was already in Photoshop.

FinalSnowFlight v2 600

In case you were curious, I used a Pengo Stylus to draw on my iPad. It was a gift from my hubby -- he knows I find art supplies & tech hardware much more romantic than flowers and jewelry. :-)


Next up: a post from the fantabulous Fred Koehler!

- Debbie

DebbieOhi.com
On Twitter: @inkyelbows and @iPadGirl
Illustrator of I'M BORED, a new picture book by Michael Ian Black (Simon & Schuster Books For Young Readers, Fall/2012)

Wednesday, November 23, 2011

That Special Gift by Russ Cox

© 2011 Russ Cox | Smiling Otis Studio

As the holidays quickly approach and we begin to reflect on this past year, I just wanted to take a moment to say "THANK YOU" to Hazel, Sheri, Debbie, Fred, and John for letting me be part of this spectacular group of artist/writers. They say you cannot teach an old dog a new trick but with the feedback, support and encouragement from my fellow Pixel Shavers, I say you can. Each one has been a major influence on the direction my artwork is heading and on me as a person. I cannot thank you enough. They are also responsible for giving me a swift kick in the rump I needed to start writing. I would never have even considered taking that journey without that push down the writing path. So this illustration I am posting today, is for each of them and to all of my family and friends. You truly are "that special gift" in my life.

Also a big THANK YOU for coming to the Pixel Shavings glog and following our journey this year. Have a wonderful holiday season and cheers to 2012!

Russ

The charismatic Debbie Ohi will be up to bat next week.

www.smilingotis.com
Smiling Otis Facebook Fan Page
Smiling Otis Studio Blog

Wednesday, November 16, 2011

Flying Robot (with waffles) from Hazel Mitchell


Following on from John Deininger's robot post last week I remembered a sample piece I produced this summer for my portfolio. Here's how it came together ....

 First a quick thumbnail about 2 x 3".
Then I worked  up the drawing in graphite, with no shading.
Scanned the line art at 600dpi and saved in photoshop.
With the multiply tool I blocked in the areas in roughly the colours I was thinking of and also coloured some of the line work itself, selecting with the magic wand tool.


 Here is the end result. Most of my work is done with the mutiply tool and with highlight/burn tools. I don't work with many layers. Not sure how the wings ended up as waffles ... I guess the little boy was having breakfast and it just happened. in this illustration I was looking to keep some looseness and texture in the shading and colouring.

Many thanks for stopping by!
Come over next week to see a seasonal offering from Russ Cox.


Toodles
Hazel

Wednesday, November 2, 2011

Going Batty by Sheralyn Barnes

            Halloween has come and gone, but the glow of the slightly sagging Jack O’ Lantern’s still illuminate these early dark November nights. I love Halloween and have trouble letting it go for another whole year. It’s the perfect holiday for the imagination with color combinations that can make an artist’s heart skip a beat. So I decided to extend Halloween just a wee bit longer so that I could take 
advantage of it for this post. 

I’ve really been trying to build my skills with color and lighting, as well as try to loosen up my computer painting technique. So here is a quick painting honoring my beloved holiday. For this piece I built layers of different colors and then erased them as if they were scratch board. I found it’s a fun technique and kind of relaxing.

©2011 Sheralyn Barnes

To see more of my work you can view my website at....

Thanks for checking in again and be sure to tune in next week for the 
great John Deininger!